I’m trying to add an interactive map to a Google Slides presentation for a client meeting, but I can’t figure out the best way to embed it so it stays clickable and doesn’t just become a static screenshot. I’ve tried copying from Google Maps and using add-ons, but either the map doesn’t load correctly or the interactivity is lost. What’s the most reliable method to embed a live, interactive map in Google Slides, and are there any specific settings or workarounds I should know about?
You can’t embed a “true” interactive map object directly inside a Google Slides file like you do in a webpage. Slides treats it like an image. So you need a workaround that keeps interactivity via a link or an overlay.
Here are a few solid options that work in client meetings.
- Use an image as a clickable overlay to the live map
• Go to Google Maps, set the view you want.
• Take a screenshot of that map.
• Insert the screenshot into the slide.
• Select the image, press Ctrl + K or use Insert → Link.
• Paste the share URL from Google Maps.
• Set your browser and Slides in presentation mode side by side during the meeting, click the map image, it opens the live interactive map in a new tab.
This keeps the slide clean and gives you one click to a live map.
-
Use an embedded web page through a third party add on
If your org allows add ons:
• In Google Slides, open Extensions → Add ons → Get add ons.
• Search something like “Embed web page” or “iFrame” tools.
• These tools often show a mini browser view inside Slides while editing, but in present mode they still kick out to a browser tab.
So it looks embedded while editing, but at presentation time you still end up with a linked web page. -
Make a short URL or QR code for live demo
• Get your Google Maps share URL.
• Shorten it with bit.ly or similar for easy typing.
• Or generate a QR code and insert it as an image on the slide.
• Audience scans it, they get full interactivity on their own device.
Nice if the client wants to zoom around themselves. -
Use a website with generated embed code, then link it
If you want more control over map style, markers, zoom, etc, use a generator to build the HTML embed for a website or dashboard, then link that from Slides.
Example workflow:
• Go to a tool like
easy Google Maps embedding for your website
• Configure your map, copy the HTML iframe code.
• Drop that iframe into a simple HTML page on your site or on a basic hosting service.
• Open that page in a browser, grab the URL.
• Back in Slides, link a map image or text to that URL.
You end up with:
Slides for structure.
A browser tab for full interactive map.
One click to jump back and forth.
- If you must stay inside one screen
Use window tiling:
• Put Slides in present mode in one window.
• Put the live map page in another.
• Use Alt + Tab quickly when you need the map.
Not pretty but works well in live demos.
Short version
Slides will flatten embeds into images.
Treat the map as a linked external view, not an embedded object.
Use a screenshot plus a link, or a QR code, to keep it fast and reliable.
You’re running into the same wall everyone hits: Google Slides just doesn’t support a real interactive embed like a web page. @yozora covered the usual “screenshot + link” flow and some add‑on/QR tricks. Those are fine, but if you’re trying to keep the client experience a bit more polished and less “click this and pray,” here are a few different approaches.
1. Use a single-slide “switchboard” with timed transitions
Instead of bouncing in and out of tabs like crazy:
- Put your map slide right after the slide where you talk about the location data.
- On the map slide, use a big, obvious button like “Open Live Map View.”
- Link that button to your interactive map URL.
- In the slide before it, add a note to yourself in the speaker notes:
- “Click map, then Alt+Tab back to Slides.”
Then practice the flow: present → click button → live map opens → show what you need → Alt+Tab right back. It feels smoother than randomly opening tabs from earlier slides.
Not super fancy, but it feels more deliberate and structured in front of a client.
2. Turn the map into a mini web app and control the view with URL params
Instead of sending people to raw Google Maps (which is messy and full of buttons you don’t control), you can:
- Create a simple HTML page with an embedded Google Map iframe.
- Use URL parameters for zoom, center, layers, etc.
- Every “state” you want to show (city level, street level, region) gets its own URL.
In Slides, you then link different shapes or labels to different URLs so you can jump directly to the exact map view for that part of the talk. It feels like you’re “switching scenes” rather than scrolling around live.
This is more work than @yozora’s screenshot method, but it looks way more intentional and less chaotic during the demo.
3. Use Presenter View to quietly manage the live map
Instead of splitting your screen, try this:
- Run Slides in Presenter View (so audience sees fullscreen slides on the projector, you see notes & next slide on your laptop).
- Open your interactive map in a separate browser window on your screen only.
- When you click the screenshot / button that links to the map, the map opens for you.
- Then share that browser window to the projector or meeting (Zoom, Meet, etc.) when you’re ready.
This is extra nice for remote calls: in Zoom/Meet you can switch what you’re sharing from “Slides tab” to “Map tab” without reloading anything. The audience just thinks you did some magic view switch.
4. If you want map interactivity inside a slide, fake it with animated layers
This won’t give you true map panning, but for some use cases it’s enough:
- Take several screenshots of the map at different zoom levels / regions.
- Stack them on top of each other on one slide.
- Use animations to show/hide each layer when you click.
So you click once: zooms in. Click again: different neighborhood. Click again: highlights a marker.
No live interactivity, but you control the narrative and avoid the “oops I dragged the map into Siberia” moment.
If you only need to tell a story with the map rather than let people freely explore, this is often better than a live map anyway.
5. Use a lightweight dashboard platform instead of raw Google Maps
Instead of Google Maps direct, throw your map into a dashboard tool (Looker Studio, Datawrapper, etc.) that:
- Lets you embed interactive maps with filters.
- Gives you a clean URL with a focused interface.
Then in Slides, you link to that dashboard. The client sees a tidy, branded, interactive map rather than the full Google Maps UI. This helps a lot if you’ve got multiple layers, metrics or regions.
Where I’d push back a bit on @yozora
They’re right that Slides flattens embeds, but I wouldn’t just treat it like “Slides here, external map there, deal with it.” For client meetings, how you move between the two matters a lot. Using a controlled flow (predefined URLs, a mini web app page, simple dashboard, planned tab switching) feels far more professional than “click and hope the browser lands somewhere useful.”
Bonus: cleaner wording for that script generator link
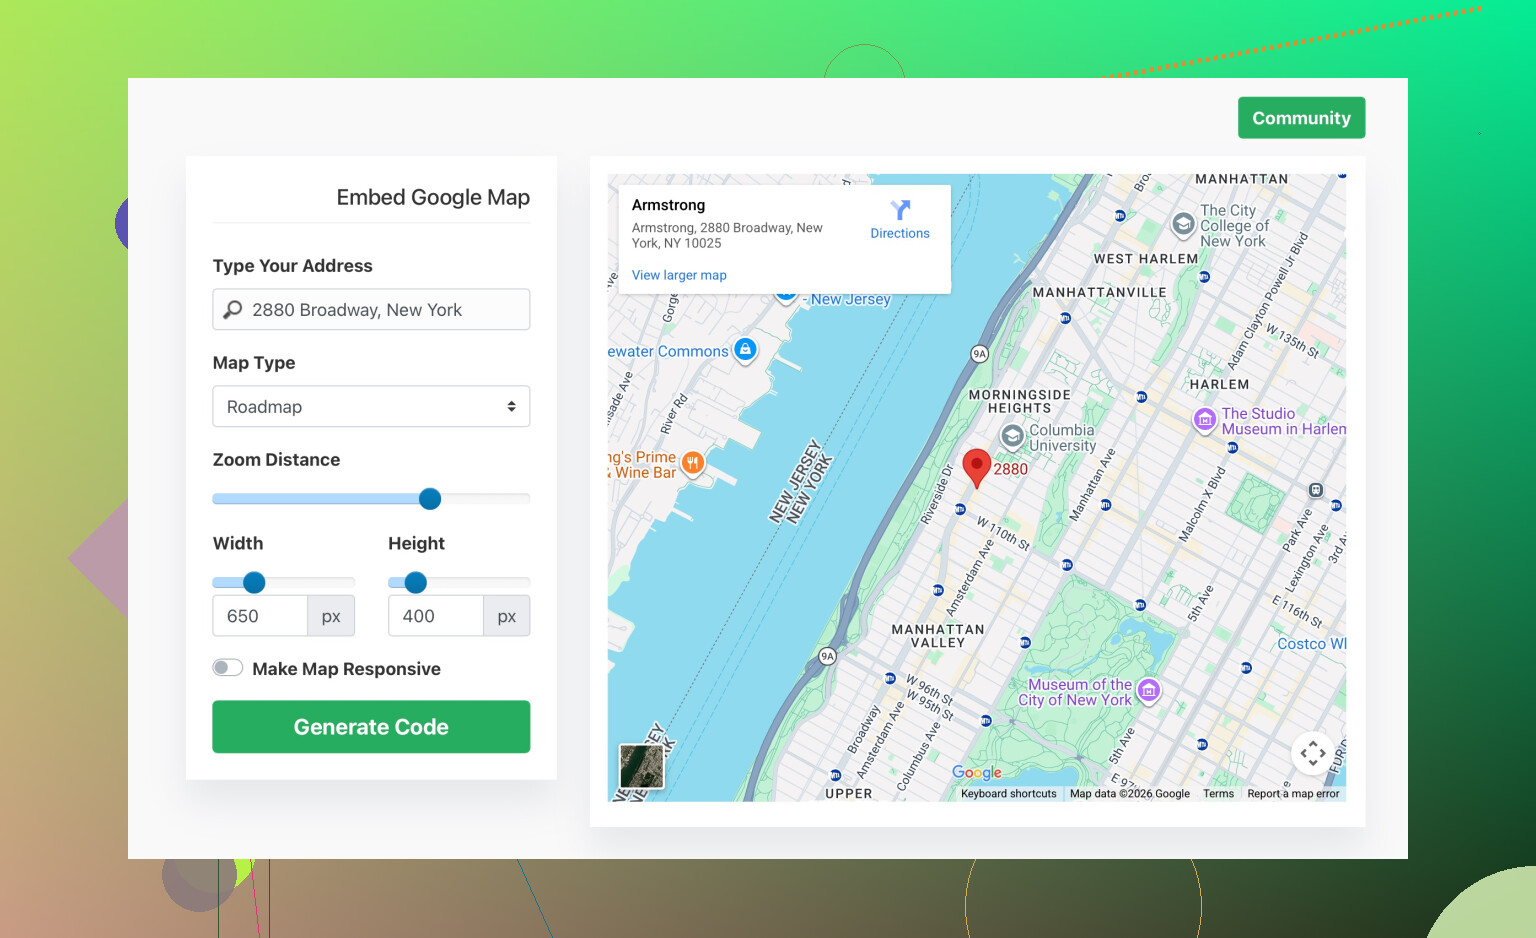
If you’re mentioning that map embed generator anywhere in your notes or docs, something like:
Use tools such as
this easy Google Map embed code builder for custom maps
to generate iframe snippets you can drop into a simple HTML page and then link from your slides.
That combo of a custom embed page plus a well‑planned linking flow from Slides is about as close as you’ll get to a “real” interactive map experience inside a deck without losing your mind.
12 Likes