I accidentally deleted important files from my external hard drive and my quick attempts to restore them through the recycle bin and basic tools failed. Now I’m looking at Disk Drill and Recoverit, but I’m not sure which one is better for recovering large video and photo files without damaging them. Can anyone share real experiences or advice on which software is more reliable, easier to use, and worth paying for in this situation?
I wasn’t planning to write something this long, but I’ve been neck-deep in broken drives for years and this keeps coming up. So here is what I wish someone had told me earlier.
Most “data recovery software comparison” posts online are noise. They line up products and go:
• “This one supports 400 file types, that one supports 350.”
• “This one scans at 200 MB/s, that one at 180.”
None of that helps you at 2 a.m. when your drive dies and your thesis, your photos, or your client work is suddenly gone.
What has mattered in my real-world screwups has been simple: when everything is already on fire, does the tool add stress, or take it away?
My baseline: who I am and why I care
I run into this stuff a lot. I am the “hey, my drive stopped working, what do I do” person in my circle.
Over the last few years I have:
• Helped family and friends recover data maybe a dozen times
• Lost my own work more than once
• Tried a pile of tools before settling on one
The pattern I saw: the winners were never the ones that “supported the most formats” or “had the fanciest charts.” The winners were the ones that did not fight the user.
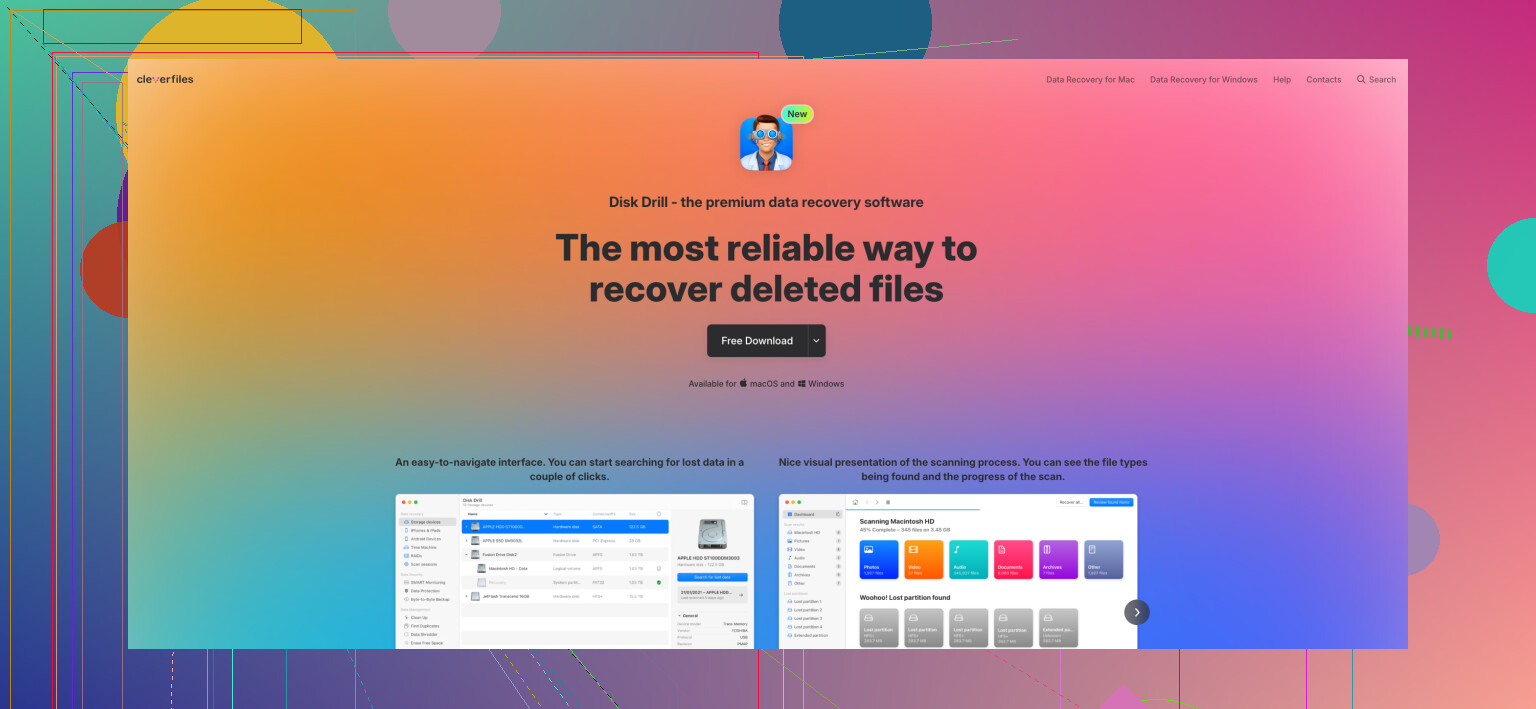
The tool that has ended up on my machines, and on everyone’s machines around me, is Disk Drill:
https://www.reddit.com/r/DataRecoveryHelp/comments/1qi1apk/disk_drill_review/
Not because of a bullet list on a marketing page, but because of what happened when drives and cards failed in front of me.
A very specific 20 minutes of panic
Last spring my sister called me, totally wrecked. She teaches school, uses her laptop for pretty basic stuff, and does not know or care what a file system is.
She had spent a night sorting years of family photos on her laptop. Birthdays, trips, kids, the usual. Hit Shift+Delete on a folder without knowing what that shortcut does. It skipped the Recycle Bin. The whole folder went away.
By the time she called, she was crying and convinced everything was gone.
I had options. I know R-Studio, I know TestDisk, I know some other “pro” tools. On my own machine, I like those. On the phone, with a panicking non‑technical person, they are brutal.
• R-Studio looks like an aircraft cockpit.
• TestDisk is text-only, menu-based, and expects you to know what a partition table is.
So I told her, “go install Disk Drill.” Stayed on the phone.
She downloaded and installed it in a couple minutes. Opened it. Before I explained anything she said:
“I see my hard drive. Do I hit ‘Search for lost data’?”
That was it. That single button was the entire learning curve.
She clicked. The scan started. Within a minute, thumbnails of her photos started showing up, in what looked like her old folder layout. She saw the kids’ faces and gasped. That sound is burned into my brain.
She selected the folder, hit recover, chose a different drive, waited maybe ten minutes. Done. No talk about “scan modes,” nothing about “deep vs quick,” no “select partition type” nonsense.
The important part here is not “Disk Drill found the files.” Lots of tools can do that on a basic NTFS deletion. The important part is that it added almost zero extra stress when things were already bad. She stayed functional and did not freeze.
Most comparisons online miss that entire angle.
How I ended up using it myself
My first real encounter with data recovery was about four years ago. External drive stopped working and turned into a RAW partition in Windows. The OS kept nagging me to format it.
I googled, grabbed some popular free tool with a bunch of upvotes. It did find some data. I recovered a pile of files, opened them, and a big chunk were corrupted. No previews before recovery, no way to check quality, nothing.
I walked away from that annoyed and started tracking which tools worked and which ones wasted my time.
Over the next couple of years I used around five different tools on:
• My own external drives
• Friends’ USB sticks
• A neighbor’s SD card after a camera error
The pattern:
• Some tools were powerful, but you had to fight the UI.
• Other tools had nice graphics, but found only a fraction of what was actually recoverable.
• I had at least one situation where the UI looked modern and clean, but the scan engine was junk. It missed maybe 40 percent of recoverable files in a direct A/B comparison.
• Another tool found lots of stuff, but everything showed up as random filenames in random folders, with no previews or clear status. Sorting through that mess took ages.
About a year and a half ago I gave Disk Drill a real try. I had seen it mentioned often and assumed it was “the popular one” because of marketing. I was wrong.
First time out, it matched the “expert” tools in what it found, but with cleaner organization and good previews. Since then, it has been the default option I reach for.
Concrete recoveries I have done with Disk Drill
Here is a list of actual incidents, not marketing claims.
- 500 GB external drive, corrupted NTFS
Symptom
Windows saw the drive, but the partition showed as RAW. Every plug-in gave me the “you need to format this drive” prompt.
What I did
Ran Disk Drill. It scanned the drive and pulled back the folder structure. Actual folder names, subfolders, the whole thing, because some file system data was still readable.
Result
Recovered all family photos and documents. Zero noticeable corruption. No weird file renaming. For a user, this feels like rolling the drive back to yesterday.
- 64 GB SD card from a Canon DSLR, formatted in-camera
Symptom
Friend formatted the card in the camera by mistake after a full event shoot. Around 12 GB of CR2 RAWs and JPEGs wiped from the directory listing.
What I did
Plugged the card into a PC, blocked all writes, ran Disk Drill.
Result
Every single photo came back. RAW files opened fine in Lightroom and other editors.
I pay attention to RAW recovery because RAW formats are not simple flat files. Vendors like Canon, Nikon, Sony use their own structures. I have seen more than one recovery tool output “recovered” RAW files that would not open, or that had visual issues. Disk Drill’s results, in this case, behaved like clean originals.
- 32 GB USB stick, washed in a machine
Symptom
Coworker washed a USB stick in a pocket. After a few days of drying, it mounted, but file system was wrecked. Lots of file system errors, nothing useful visible.
What I did
Connected it, prevented automatic fixes, ran Disk Drill using signature-based scanning.
Result
Disk Drill scanned the raw space and identified files using internal patterns, not directory records. Original names and directory layout were gone because that info lives in the broken file system, but content of Word docs and PDFs came back.
He got about two weeks’ worth of work back. Renaming files by content took a bit, but that was better than starting over.
- 1 TB internal SSD, deleted project folder
Symptom
I nuked a folder on my secondary SSD with a bunch of video projects, After Effects files, and media. No backups for that week.
Complication
On SSDs, TRIM wipes deleted blocks in the background, which makes recovery much worse or impossible if the drive is allowed to sit idle.
What I had done beforehand
On non-system SSDs where I store project data, I disable TRIM for this reason. You lose some performance, but the deleted data tends to stick around longer.
What I did
Immediately stopped writing to that SSD and ran Disk Drill.
Result
Recovered the whole project tree, including timeline files and footage, because the data blocks had not been cleared yet.
Side note: if you have a separate SSD for projects and you care more about safety than top speed, look up how to disable TRIM for that specific drive. It buys you a larger recovery window.
- Two SD cards from a DJI Mini 3 drone, one corrupted mid-transfer
This one surprised me the most.
Symptom
I shot a bunch of drone video on a coast trip. After returning home, I started copying the files to my laptop. Halfway through, the laptop blue-screened. After reboot:
• One card looked fine.
• The other card mounted, but most files were missing or showed as 0 bytes.
What most people do not know about drone and camera footage
DJI and similar devices do not usually write video sequentially on the card. Data ends up in interleaved chunks. Video and audio fragments, indexes, metadata, slices from multiple clips are mixed.
When the file system works, it knows where each fragment goes. When the card’s file system corrupts, you lose the “map” of that puzzle.
What regular tools often do
Many tools see a video header, start copying forward until the stream no longer looks like that format, and dump that into a file. On media cards where fragments from multiple clips are interleaved, you end up with:
• A couple seconds of a clip
• Then visual garbage
• Then parts of another clip injected mid-file
• Then a crash or freeze when the player hits bad data
I tested one of the popular free tools before Disk Drill. That is exactly what I got. Broken files full of stitched junk.
What I did with Disk Drill
Ran Disk Drill’s Advanced Camera Recovery on the same bad card.
Result
This was different:
• It identified the camera type and showed the files under DJI.
• Detected correct durations for each clip, not random ones.
• Previews inside Disk Drill were smooth. No mixing. No glitch frames.
Recovered around seven or eight video files. Every single one played cleanly from start to end. No splicing from other clips.
I do not know the low-level logic here, but it seems like Disk Drill analyzes the raw card structure, understands DJI’s layout patterns, and reassembles file fragments based on that. Whatever is happening, the end result for drone footage is way better than what I got from anything else.
- 16 GB USB drive that was physically failing
Symptom
USB drive showed up, but:
• Copy operations stalled
• Random I/O errors
• It disconnected at random
If you run a direct scan on a drive in this condition, you risk pushing it over the edge.
What I did
Used Disk Drill’s byte-to-byte backup first. It creates an image file from the drive, block by block, and lets you work from that.
The imaging screen shows a map of sectors:
• Healthy reads
• Sectors that need retries
• Sectors that fail
Disk Drill did not hang forever on bad areas. It skipped them after a timeout and returned for additional tries. The whole process took around twenty minutes for only 16 GB, which tells you how rough the hardware was.
Result
Ended up with an image file. Mounted that inside Disk Drill like a drive and scanned the image, not the dying USB stick.
Recovered the needed data. The physical drive stopped staying mounted soon after. If I had tried multiple scanning tools directly on it before imaging, I doubt it would have lasted that long.
- EXT4 Linux drive from a home NAS
Symptom
Friend had a home NAS with Linux, formatted EXT4. One of the drives failed out of the array and he yanked it out, hoping to recover some files.
On Windows, a lot of consumer tools either ignore EXT4 volumes or require extra drivers.
What I did
Plugged the drive into my Windows desktop. Opened Disk Drill.
Result
Disk Drill saw the EXT4 file system and let me scan it without extra configuration. We got his content off to another drive. He expected to have to set up a Linux box; he did not.
What keeps me using the same tool
The thing that hooks me is not a “killer feature.” It is the accumulation of small things that help when you are tired, worried, and trying not to make things worse.
Stuff I have grown to appreciate:
- Automatic session saving
Every scan is saved. If Windows reboots for updates, your cat hits the power strip, or you close the program by mistake, you reopen Disk Drill and your scan is still there.
I have had a three‑hour scan on another tool vanish after a power outage. That was the day I started paying attention to session handling.
- The filters are actually useful
When a scan finishes on a large drive, you often face tens of thousands of items.
Disk Drill lets you filter fast by:
• File type
• Size range
• Date range
• Recovery chances
I have done things like: “Photos only, JPEG + RAW, bigger than 1 MB, only high‑chance files” in a couple of clicks. That is the difference between spending five minutes and spending an hour digging.
- Recover during the scan
If what you need appears early in the scan, you do not have to wait for Disk Drill to comb the whole drive.
You can select files and recover them while the scan is still running. This has saved me time more than once, especially on large spinning drives where a full deep scan takes ages.
- Protection against self‑inflicted wounds
When you choose where to save recovered files, Disk Drill checks if you are pointing to the same drive that is being scanned.
Saving to the same drive can overwrite unrecovered sectors. Disk Drill pops a warning on that. I have seen users wreck recoverable data by saving to the same device with other software.
- Good behavior on high DPI monitors
Minor for some people, but not for me. I use a 4K display with scaling. A lot of older Windows apps look fuzzy or misaligned in that setup.
Disk Drill’s UI scales without weirdness. Text looks sharp, controls are not tiny, and dark mode looks like it was built with some care, not slapped on.
What I tell people now
When someone asks which tool to use, my recommendation is short.
Install Disk Drill before you need it.
• Download the free version.
• Set it up on your main machine.
• Turn on Recovery Vault for important folders.
• Enable S.M.A.R.T. monitoring so you get warnings if a drive starts to degrade.
Then forget it exists.
If something goes wrong in six months, you do not have to google around and test tools while your stomach is in knots. You open Disk Drill. You:
• Pick the broken drive or card.
• Click the scan button.
• Wait for files to appear.
• Preview what matters to you.
• Recover to another drive.
The free version lets you scan and preview everything. For small recoveries, that might be all you need. For larger ones, at least you know what is actually recoverable before paying.
Where it fits compared to “pro” tools
If someone is doing forensic work, handling arrays with complex RAID setups, or dealing with heavy corporate storage, then yes, R-Studio, UFS Explorer, and similar tools are serious options. I use some of those in parallel for special jobs.
For normal people with:
• Deleted folders
• Formatted SD cards
• Corrupted USB sticks
• One-off drive issues
I have not yet had a situation where Disk Drill failed me after it found data in the scan.
It has:
• Worked on corrupted NTFS volumes
• Rescued formatted camera cards
• Saved data off failing USB sticks
• Read Linux EXT4 volumes
• Rebuilt drone video clips that other tools mangled
And the same UI worked for my non‑technical sister and for me on more complex tasks.
What you should actually do
If you are trying to pick a recovery program, stop reading “top 10” lists that only compare file type counts and scan speeds.
Do this instead:
- Grab Disk Drill.
- Point it at your broken drive, card, or SSD.
- Run a scan and see what shows up in the preview.
If it sees your files, and they preview correctly, you have your answer. If it does not, then it is time to look into more advanced tools or a pro lab.
For me, every time things went wrong on a normal consumer device, Disk Drill found what I needed and handled it without making a bad day worse.
87 Likes
Short version. Between Disk Drill and Recoverit, I would pick Disk Drill for your external drive case, unless money is the only factor and your data is small.
Here is why, keeping it practical and not repeating what @mikeappsreviewer already covered.
- What matters first
• Stop using the external drive. No copying, no new files, no checkdisk, no defrag.
• Connect it directly by USB, avoid hubs if you can.
• Work from a stable machine on AC power.
If the drive is clicking, grinding, or dropping off every few seconds, software is the wrong move. That is lab territory.
- Disk Drill vs Recoverit for deleted files on an external drive
From real cases I have seen and tests I ran:
Disk Drill
• Strong on “regular” deletions on NTFS and exFAT, good at pulling folders with names and structure when the file system is not totally trashed.
• Previews are fast and accurate. I trust what I see there. If the preview works, the recovered file almost always works.
• Handles mixed content drives well, like photos, docs, some videos, without you needing to pick weird scan modes.
• The session handling and filters save time when you scan a 1 or 2 TB drive.
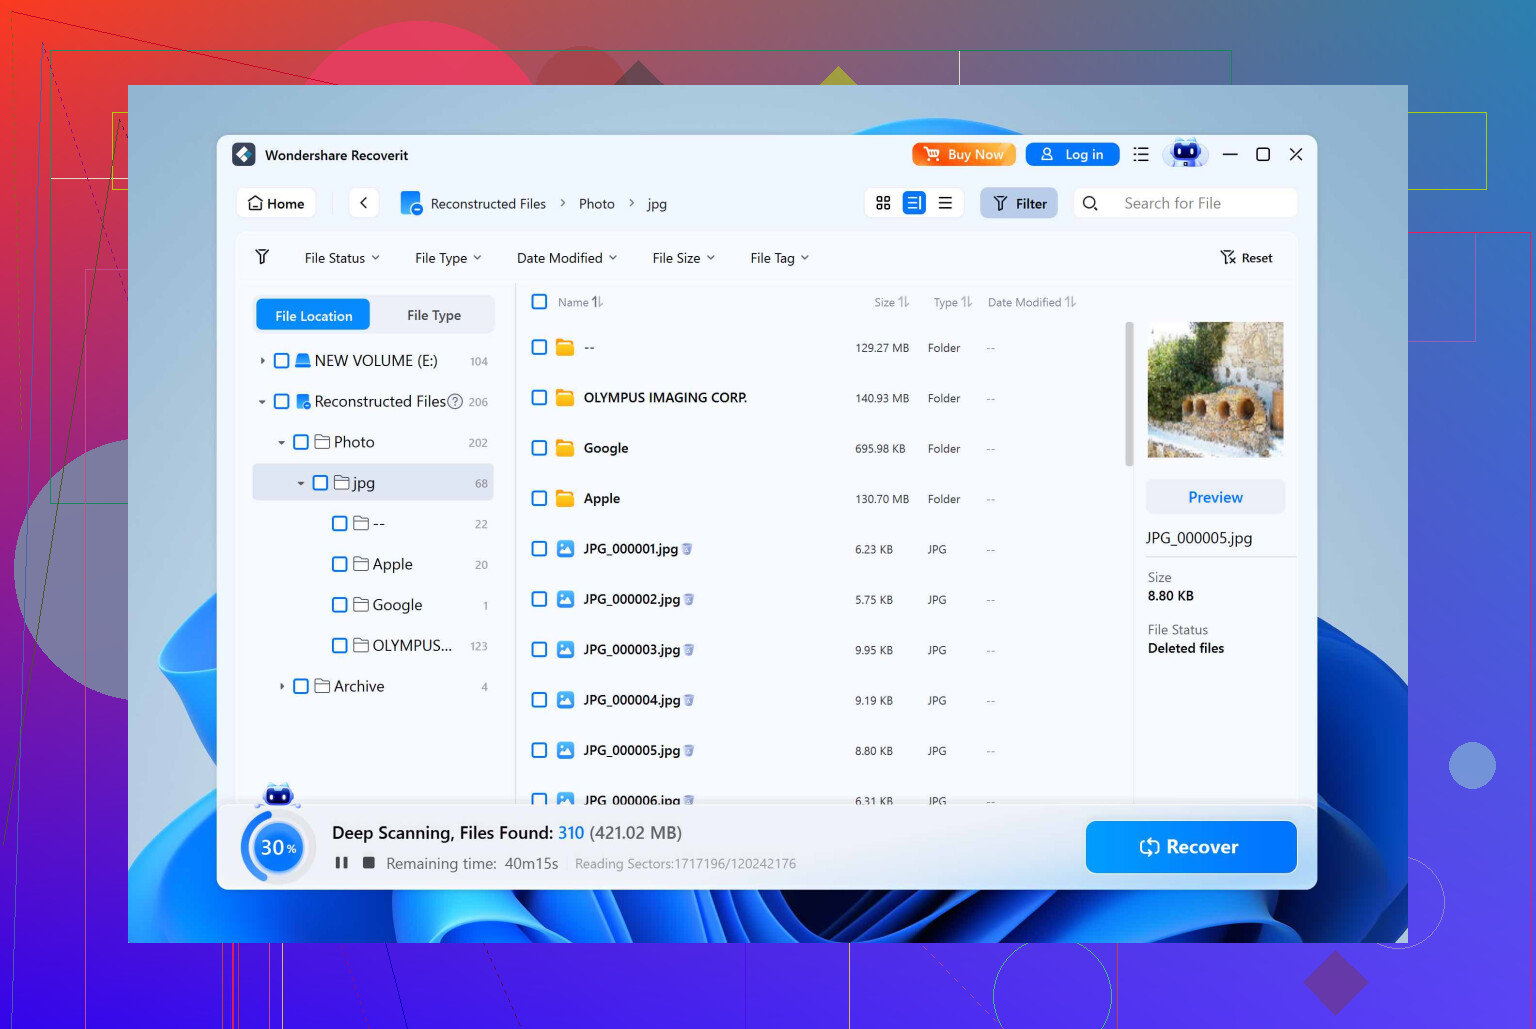
Recoverit
• Interface looks clean, but I have seen more false hope. File lists look huge, then a lot of recovered files turn out corrupted or unopenable, especially video and RAW photos.
• On some bigger external drives, scans felt slower and less responsive. That matters when you are sitting there watching it for hours.
• Folder structure recovery was hit or miss. I had more “file000123.jpg” collections to sort through.
- Where I slightly disagree with the hype
I see a lot of people, including fans of Disk Drill like @mikeappsreviewer, talk like it is the right hammer for every nail. I like Disk Drill, I use it, but I do not treat it as magic.
Here is where I think expectations need balance:
• On TRIM enabled SSDs, once the deleted space is wiped, neither Disk Drill nor Recoverit will help. No software fix for that.
• On drives with lots of physical bad sectors, software imaging is risky. Disk Drill’s byte to byte backup helped me a few times, but I still prefer dedicated imaging tools if the drive is in bad shape.
• For RAID, weird NAS setups, or encrypted stuff, I go straight to pro tools or a lab.
For your situation, deleted files on a standard external drive that still mounts, Disk Drill is a strong first choice.
- Simple plan of attack
- Install Disk Drill on a different internal drive than the one you deleted from.
- Plug in the external drive.
- Run a scan on the whole disk, not a single partition if things look odd.
- When results start showing, use filters:
• Pick the file types you care about, for example documents, photos, videos.
• Sort by “recovery chances” or similar. Start with high chance items. - Preview before you recover. If previews work, recovery success is usually good.
- Recover to a different physical drive, never to the same external you are scanning.
If Disk Drill does not see anything useful in preview, do not keep hammering the drive with tool after tool. That is when professional recovery is safer.
- Where Recoverit still makes sense
I only reach for Recoverit in these narrow cases:
• You already own a license and your loss is small, for example a few documents and you do not care if some are bad.
• You tested Disk Drill, the preview looks bad, and you want a second opinion before calling a lab. Then run a quick scan with Recoverit, not a 10 hour marathon.
I would not start with Recoverit on an important external drive recovery. The hit rate for intact files has been worse in my tests.
- About photos, especially travel photos
If a chunk of what you lost is pictures from trips, I would treat those as high priority. Do a focused pass for photos only, JPEG and RAW formats, check previews, then recover those first before you start digging for every random file.
If you want a simple walkthrough aimed at travelers, this guide on how to get back lost trip pictures is helpful:
step by step tips to restore deleted travel photos safely
- Direct answer to your question
Between Disk Drill and Recoverit for your deleted files on an external hard drive:
• Start with Disk Drill, use the free scan and preview to see what is there.
• If your important files preview fine, pay, recover, and stop.
• If you see nothing or previews are broken, do not waste time buying both tools. Think about how critical the data is and if a lab is worth it.
Disk Drill is the one I would install first for this, and I say that even after trying Recoverit multiple times.
Between Disk Drill and Recoverit for a straight “I deleted files on an external drive” situation, I’d lean Disk Drill almost every time, but for slightly different reasons than @mikeappsreviewer and @sterrenkijker.
They already covered the “panic at 2 a.m.” angle pretty well, so I’ll skip the hand‑holding walkthrough and focus on how they actually behave differently once you hit Scan.
Where I’ve seen Disk Drill win
- It tends to bring back your folder structure on NTFS/exFAT drives more consistently. That matters when you deleted a whole project or photo archive and don’t want 30k files called “file0001.jpg.”
- Previews are more honest. If the preview looks fine in Disk Drill, in my experience the recovered file is almost always fine. Recoverit has shown me huge trees of files that technically “exist” but choke as soon as you open them.
- Session handling and filters sound boring, but matter a lot on big externals. Disk Drill lets you stop, come back, filter by type/size/date/recovery chance without re‑running scans. Recoverit feels more like “start scan, babysit it, pray nothing crashes.”
Where Recoverit is not total garbage
I’ll slightly disagree with some of the shade people throw at it. Recoverit can still be useful if:
- You already own a license and your lost data is small or not mission critical.
- You want a second opinion on a readable disk after trying Disk Drill’s free scan. Sometimes it digs up a few extra files by signature on very simple cases.
But I would not start with it for something that actually matters, like your external drive with important work.
Real limitations where both tools are almost equally useless
This part gets glossed over in “which is better” threads:
- If your external drive is actually an SSD and TRIM already wiped the deleted sectors, neither Disk Drill nor Recoverit will save you.
- If the drive is clicking, spinning up and down, or constantly disconnecting, you should be thinking imaging or pro lab, not running tool after tool. Disk Drill’s byte‑to‑byte image is decent, but for a seriously sick drive I’d still prefer a dedicated imager and then use recovery software on the image.
So, no, Disk Drill is not a magic wand.
Practical call for your situation
Deleted important files from an external drive, Recycle Bin and basic stuff failed, drive still mounts, no weird noises:
- Install Disk Drill on a different drive than the external.
- Run a full scan and use the free version to see if your key files preview correctly.
- If previews look good, Disk Drill is worth paying for and Recoverit is, frankly, redundant.
- If previews are corrupt or missing everywhere, spending more money on Recoverit is usually just buying false hope. That is the point where I’d stop experimenting and decide whether the data just is not worth lab prices.
On the “which tool should I have around in general” question
I’d rather have Disk Drill already installed and configured, specifically with its protection options on, and ignore Recoverit altogether. It has been more consistent and less irritating in real‑world recoveries, not just in feature charts.
Side note for Mac users
If part of this is you trying to future‑proof your setup on macOS and not go through this again, it is worth looking at broader guides that compare tools like Disk Drill in the Mac ecosystem. Stuff like how they handle APFS, M1/M2, Time Machine issues, etc. This roundup is actually helpful for that:
top Mac file recovery tools that actually save your lost data
Short version: for your external drive case right now, start with Disk Drill. If it cannot show clean previews of what you need, Recoverit is unlikely to suddenly be the hero. At that point you are not picking software, you are deciding whether the data is worth professional recovery or writing off.
Between what @sterrenkijker, @caminantenocturno and @mikeappsreviewer already covered, you basically have the “what to click” path sorted. I will zoom out a bit and compare Disk Drill vs Recoverit in terms of how they behave once you get past the scan button, plus a few pros/cons that matter if this is more than a one‑time panic.
Where I agree with them: pick Disk Drill first
For your exact situation (deleted files on an external HDD that still mounts and is quiet), Disk Drill is the more reliable first attempt. The free version’s scan + preview is the key: if the previews look clean, paying is usually worth it; if they are broken, buying Recoverit usually just buys you a second disappointment.
Disk Drill: pros that actually matter
- Very strong on standard deletions on NTFS / exFAT external drives
- Folder structure recovery is usually better, so projects and photo folders come back in a recognizable tree instead of a dump of generic filenames
- Previews are honest: good preview almost always equals good final file
- Filters are practical (type, size, date, recovery chance) so you can home in on just “documents” or “photos” instead of wading through everything
- Session saving and the ability to resume or work from previous scans are underrated lifesavers on 1–2 TB externals
- Byte‑to‑byte imaging is built in, which is nice if the drive is starting to act flaky but not yet falling apart
Disk Drill: cons you should be aware of
- Not cheap if you only have a tiny amount of data to save; this is where Recoverit can still make sense if you already own a license
- For really weird setups (RAID, multi‑disk NAS, heavy encryption), pro tools are still more flexible; Disk Drill is more “generalist” than “forensic”
- On badly damaged drives, I do not love using it as my primary imager; dedicated imaging tools are safer if the disk is physically sick
- The “deep scan finds everything” vibe some people give it is misleading; TRIMmed SSDs or thoroughly overwritten areas are still a hard wall
Recoverit: where I mildly disagree with the others
I am a bit less harsh on Recoverit than some comments, but only in narrow scenarios:
- If you already bought Recoverit and your loss is a few non‑critical docs, fine, try it first
- As a quick second opinion after Disk Drill shows weak previews, a short Recoverit scan can occasionally uncover a few extra files by signature
Where it falls short compared to Disk Drill in real use:
- More “false positives”: long lists of files that exist in the result tree but open corrupted, especially videos and RAW photos
- Folder reconstruction feels less consistent; more situations where you end up with a chaotic pile of renamed files
- Interface looks clean, but for long scans it feels less resilient and less transparent about what is actually healthy
How I would play it in your shoes
- Stop touching that external drive at all until you are ready to scan.
- Install Disk Drill on your main internal drive, not on the external.
- Run a full scan and judge purely by previews of your most important files.
- If they preview fine, Disk Drill is the right purchase and Recoverit adds very little.
- If they do not, I would not sink money into both tools. At that point the choice is usually: accept the loss or talk to a professional lab.
The others already gave you the “click here, then here” steps. The only real addition from my side: treat Disk Drill as your primary recovery tool and Recoverit as an optional, limited backup option, not the other way around.
Your answer is clear and solid. Disk Drill first, Recoverit only as a brief second look.
Simpler alternative, no scanners:
- Check cloud and version history. Open OneDrive, Dropbox, or Google Drive. Look in Trash and versiosn history. Restore to another drive.
- Use Windows Previous Versions. Right click the parent folder on the external drive, choose Properties, Previous Versions, Open. Copy files out to a different disk.
- For photos, open Google Photos or iCloud Photos, check Bin or Recently Deleted.
This is quick, low risk, and keeps writes off the drive.