I recently noticed my computer storage is almost full because my files are still on OneDrive, and I want to move them back to my local hard drive. I’m not sure of the safest or easiest way to do this without losing anything important. Any step-by-step help would be really appreciated.
Hassle-Free Way to Handle OneDrive Files on Your Computer
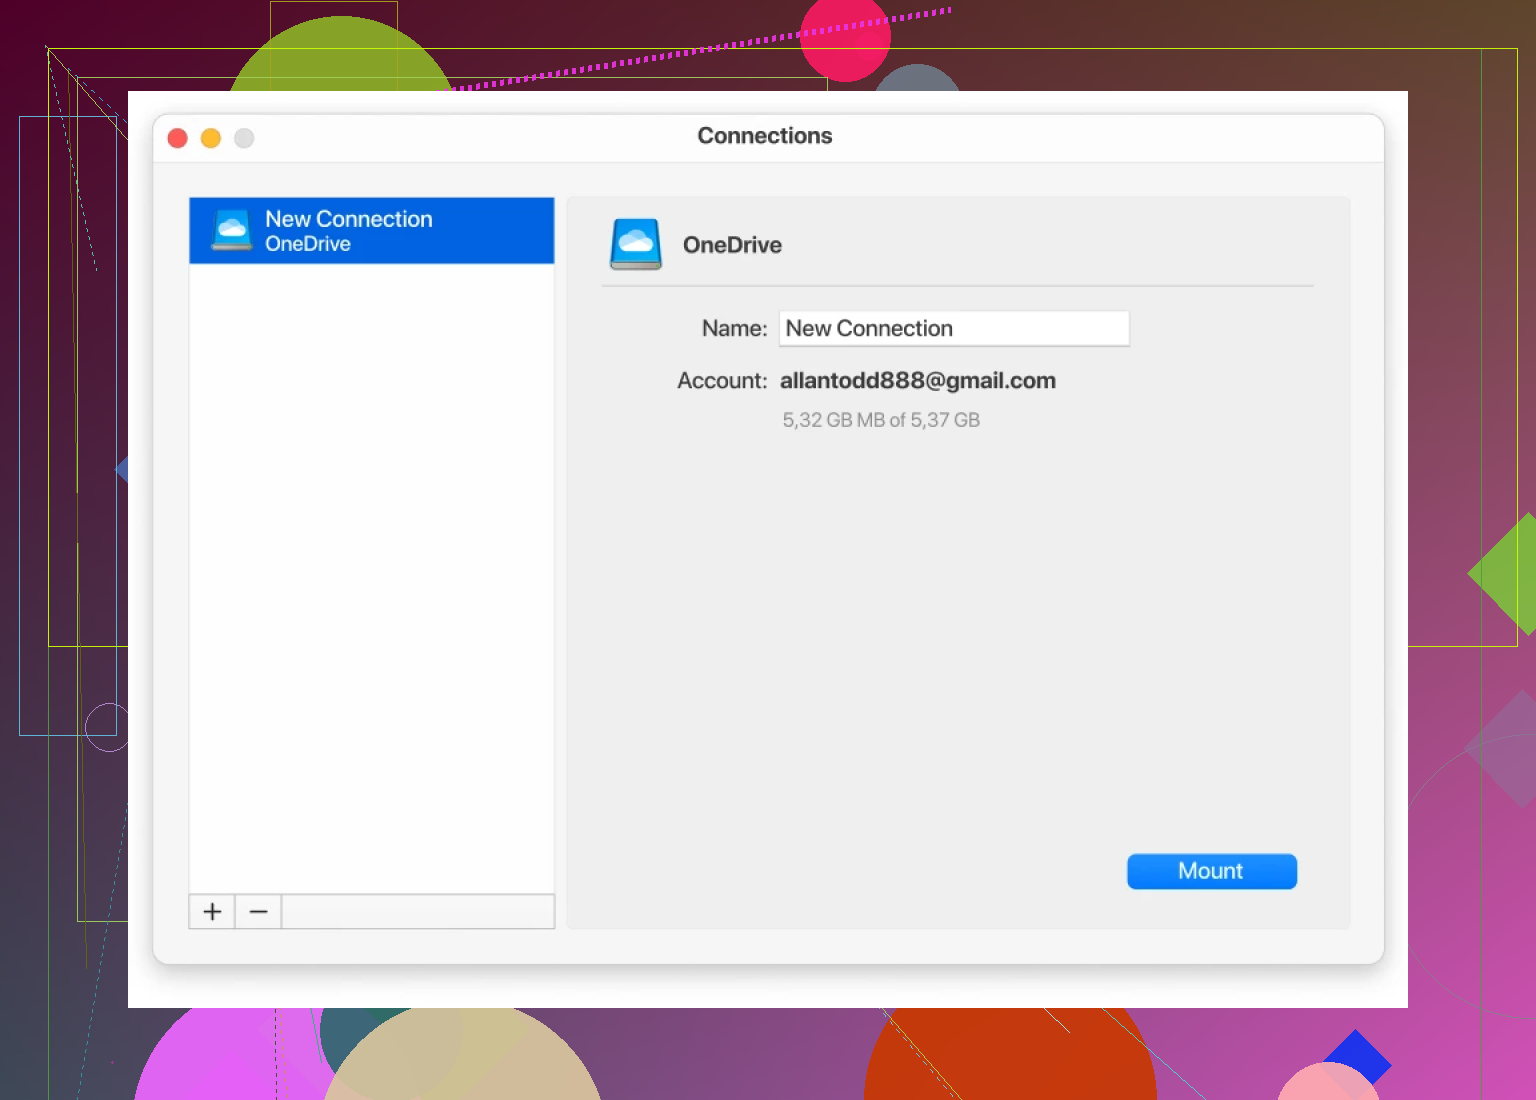
Alright, so here’s what’s worked for me more times than I can count: CloudMounter has been my go-to tool for turning cloud storage into something that actually fits into my desktop life. No magic, just a process that won’t make you pull your hair out.
Getting OneDrive to Behave Like a Native Drive
I was skeptical at first, honestly. Cloud storage getting mapped directly into Finder (Mac) or Windows Explorer felt a bit like science fiction. But after signing into my OneDrive via CloudMounter, boom—it just sits there, showing up as if it’s another hard drive. If you can find your “Downloads” folder, you’ve already got the skills needed for this.
How You Can Move Files Without All the Fuss
Picture this: you’re in Finder or Explorer, and your OneDrive pops up in the sidebar. All your cloud files? Right there, no second app window, no random browser tab lurking somewhere. Wanted those files on the Desktop? Just drag ‘em over, drop them into the folder you want—CloudMounter does the transfer work unseen, hustling away in the background.
Zero need to wrestle with browser downloads or try to wrangle OneDrive’s full client syncing your whole cloud to your disk. It’s just select, drag, drop—done.
Passing It Forward
If you run into snags or your files go missing in the shuffle, drop a reply. Stuff like this should just work, and in my experience, CloudMounter makes it feel native. Hope this shortcut saves you some time, like it did for me!
21 Likes
So, you’re drowning in OneDrive clutter and your PC’s gasping for air—been there! While @mikeappsreviewer is all about CloudMounter (which is honestly cool if you want pure drag n’ drop action outside the browser), I gotta toss in another perspective: Sometimes, just going old-school with the built-in OneDrive client isn’t as painful as it sounds.
On Windows, OneDrive bakes right into File Explorer already. If you head to your OneDrive folder (should be chillin’ in the sidebar), some files are ‘online-only’ (cloud icon) and take up zero space; others are ‘available offline’ (checkmark). You can right-click what you want, pick ‘Always keep on this device,’ and let 'em subtly seep down from the cloud. If you specifically want to dislodge things from OneDrive and dump them elsewhere, you can just copy-paste or drag them to another folder, then delete from OneDrive if you wanna free it all up.
But the catch: The official app sometimes syncs more than you want, which can nuke your storage faster than accidentally hitting ‘sync all podcasts.’ That’s where third-party tools like CloudMounter win: they act like a remote disk, and you only grab what you want, when you want it, no random syncstorms.
One caution, whichever path: Double-check files moved actually land safely before you delete anything from OneDrive itself! Backup before deleting—ask me how I learned that one the hard way. And while CloudMounter is nifty, if you hate installing extra stuff or prefer to minimize paid apps, Windows’ own features still get the job done (just maybe a tad clunkier).
TL;DR: Native OneDrive can do it with more manual tinkering; CloudMounter streamlines the process and gives you more granularity. Both work, depends if you wanna keep it vanilla or let a dedicated app run the heavy lifting. Either way, check twice, delete once!
Alright, let’s actually cut to the chase here—everyone’s pitching either CloudMounter (looks cool, yeah, solid if you wanna treat cloud like local drives) or just using Microsoft’s own OneDrive integration (less slick but gets the job done). But honestly, for the real control freaks (like me), why not bypass all of that with the absolutely ancient but reliable ZIP-and-download-from-the-web trick?
Here goes: Log in to OneDrive online, select the folders/files you need, and hit Download. OneDrive zips them and downloads as a fat archive. Extract locally. Bam, no sync shenanigans or random client installs. You see what you get—literally. Downsides: For huge drives, you’ll max out the web interface real quick, so yeah, if you’re trying to get all your files, maybe don’t try this with everything at once unless you’re on gigabit and ready for a coffee refill.
Crazy thing? This way, nothing gets automatically deleted until YOU do it. You can unzip, check your stuff, THEN clear the cloud. Wanna keep it surgical? Download specific stuff only. Only caveat: Big folders can time out or fail mid-download, which is deeply annoying (see also: me cursing at my browser last Tuesday).
So, unlike CloudMounter or the client—which sort of blur the line between what’s in the cloud and what’s actually here—this is old-school: Download, see files on your drive, THEN clean up OneDrive. Not as fast as drag/drop, and no fancy mapped drives, but sometimes caveman method keeps ya from losing stuff.
One last tip: If you do go with the Windows client or CloudMounter, always double-tap that your files REALLY exist on your drive before nuking anything from OneDrive. Data loss regret = infinite sadness.
TL;DR—manual download for maximum control, local check before delete, and for the love of all things digital, BACK. IT. UP. (And ignore anyone who says there’s only one “best” way…sometimes old dogs have the best tricks.)